Last spring a neighbor showed me her water bill and asked why her tomatoes still looked thirsty. She was running a sprinkler twenty minutes a night, soaking the whole yard, and most of that water was evaporating off the leaves or running down the sidewalk before it ever reached a root. We swapped her setup for a simple line of tubing with little emitters at each plant, and by July her bill dropped and her tomatoes doubled.
That is the whole promise of drip irrigation in one story. You put water exactly where the plant needs it, slowly, and almost none of it goes to waste.
If you are looking into drip irrigation for beginners, you are in the right spot. I am going to walk you through what it is, how it moves water, and why so many gardeners here in Tucson (and everywhere else) switch and never look back.
Key takeaways
- Drip irrigation delivers water slowly and directly to plant roots through tubing and small emitters, wasting very little to evaporation or runoff.
- Most home systems run at low pressure (around 15-30 psi) and use 1/2 inch main tubing with 1/4 inch feeder lines.
- Emitters are rated in gallons per hour (gph), commonly 0.5, 1, or 2 gph, so you match flow to each plant.
- A basic kit for a small garden often costs $30 to $80 and installs in an afternoon with no glue or digging.
What drip irrigation actually is
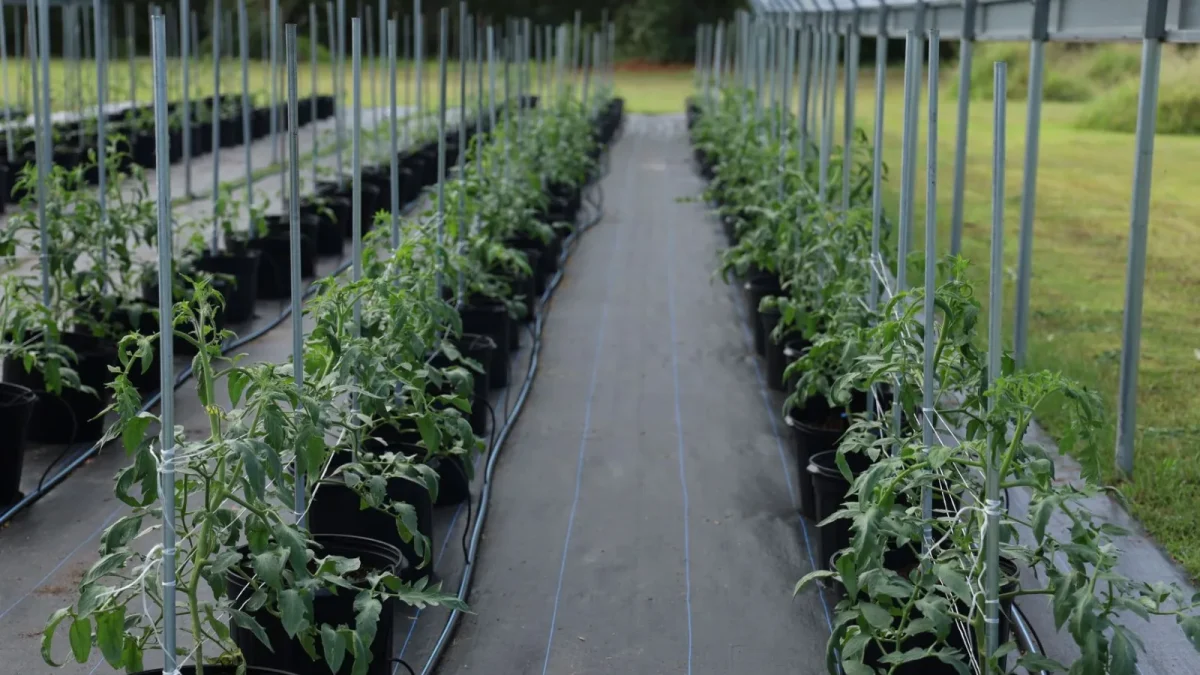
Drip irrigation is a watering method that carries water through flexible plastic tubing and releases it in slow drips at the base of each plant. The release point is a small fitting called an emitter (sometimes called a dripper), and it is engineered to let out a set amount of water per hour.
Compare that to a sprinkler, which throws water up into the air over a wide area. A sprinkler waters the soil, the mulch, the weeds, and the fence. Drip waters the plant.
Because the water comes out slowly, the soil has time to soak it in rather than letting it puddle and run off. That slow, targeted delivery is the reason drip systems use so much less water. The EPA notes that efficient irrigation can meaningfully cut outdoor water use, and drip is about as efficient as home watering gets. If you want the full mechanical picture, I break down how drip irrigation works, step by step in a separate guide.
Why a beginner would choose drip
The honest answer is that it is forgiving. You do not need to be handy, and you do not need special tools.
Here is what usually sells people:
- It saves water, often 30 to 50 percent compared with sprinklers, because there is little evaporation or runoff.
- It cuts down on weeds, since you are not watering the bare soil between plants.
- It reduces leaf disease, because the foliage stays dry (wet leaves overnight invite fungus).
- It is quiet, low pressure, and easy to expand one plant at a time.
A mistake I see constantly is a new gardener assuming drip is complicated because it involves tubing and fittings. It is not. Most of the parts push together by hand, and if you make a mistake, you pull it apart and try again. There is no glue and no plumbing skill required.
Quick tip
Start with a single garden bed before you plumb the whole yard. Get one line working, watch how the soil behaves for a week, then expand. You will learn faster and waste less tubing.
How the water moves, in plain terms
Water leaves your outdoor faucet (the hose bib) and passes through a few small parts before it reaches your plants. First a backflow preventer, so garden water cannot siphon back into your drinking supply. Then usually a filter and a pressure regulator.
That pressure regulator matters more than beginners expect. House water often runs at 40 to 60 psi, but drip parts are happiest around 15 to 30 psi. Too much pressure and your fittings pop apart or your emitters spray instead of drip. I cover the numbers in more detail in this rundown of water pressure basics for drip systems.
From the regulator, water enters the main line, typically 1/2 inch tubing. Off that main line you run thin 1/4 inch feeder tubing to individual plants, and each plant gets an emitter. The whole thing is a branching tree: one source, a trunk, and little branches ending at roots.
Watch out
Never connect drip tubing straight to a full-pressure faucet without a pressure regulator. I have seen fittings blow off and soak a garage. The regulator is a $6 part that saves you a headache.
The core parts you will meet
You do not need to memorize a parts catalog. There are really just a handful of components, and once you see them together they make sense. I list them all with photos in this breakdown of core drip system components explained, but here is the short version.
| Part | What it does |
|---|---|
| Backflow preventer | Stops garden water from flowing back into your house supply. |
| Filter | Catches grit so emitters do not clog. |
| Pressure regulator | Drops house pressure to a safe 15-30 psi. |
| 1/2 inch tubing | The main line that carries water through your beds. |
| 1/4 inch tubing | Thin feeder lines that reach individual plants. |
| Emitters | Release water at a set rate, usually 0.5, 1, or 2 gph. |
Sizing the tubing trips people up, so if you are unsure which diameter to buy, this guide to drip tubing sizes and how to pick one lays it out plainly.
Matching water to the plant
This is where drip gets genuinely satisfying. Because emitters come in different flow rates, you can give a thirsty tomato more water than a drought-tough rosemary right next to it.
A rough starting point: a young tomato might get a 2 gph emitter, a pepper a 1 gph, and established herbs a 0.5 gph. Run the system, then dig down two or three inches an hour later and feel the soil. Damp and crumbly is the goal, not soggy.
Figuring out how much each plant actually wants is the part beginners overthink. I wrote a whole piece on how to calculate plant water needs for drip so you can size emitters with confidence instead of guessing.
Good to know
Drip run times are usually longer than sprinkler times because the flow is slow. A drip zone might run 30 to 60 minutes, not 10. New numbers surprise people, which is why I explain how long to run drip irrigation separately.
Is drip always the right pick?
Mostly, but not for everything. Drip shines for garden beds, rows of vegetables, shrubs, trees, and containers. For a wide lawn, sprinklers still make more sense, since grass wants even coverage across a big flat area.
Soaker hoses sit somewhere in between and can be great for a tight row. If you are weighing your options, I compare all three head to head in drip vs sprinkler vs soaker hose.
One more honest note: drip parts are small and they can clog if your water is gritty or hard. That is what the filter is for, and it is why I flush my lines a couple times a season. Ten minutes of maintenance beats a dead pepper plant.
Your first steps, in order
When I set up a bed for a first timer, this is the sequence I follow:
- Sketch your beds and mark where each plant sits. A simple drawing prevents most rookie mistakes.
- Attach the backflow preventer, filter, and pressure regulator to the faucet, in that order.
- Run 1/2 inch main tubing along your beds and pin it down with stakes.
- Punch feeder holes and run 1/4 inch tubing to each plant, ending with a matched emitter.
- Turn the water on low, walk the line, and check every emitter is dripping.
Planning that layout is worth doing before you buy a single fitting. This walkthrough on how to plan a drip irrigation layout will save you a return trip to the store.
Where to go from here
You now have the shape of it: slow water, right at the roots, through simple push-together parts at low pressure. That is drip irrigation for beginners in a nutshell, and honestly it is most of what you need to get started this weekend.
If any term above felt unfamiliar, keep this glossary of drip irrigation terms every beginner needs open in another tab while you shop. For the technically curious, the University of Arizona Cooperative Extension publishes free, region-tested irrigation guides worth reading. Start small, watch your plants, and adjust. The system is easy to change, and so are you.
Reference: EPA WaterSense watering tips and University of Arizona Cooperative Extension.
More guides in Drip Irrigation Basics
- Beginner Drip Irrigation Planning Mistakes
- Common Drip Irrigation Myths for Beginners
- Core Drip System Components Explained
- Drip Irrigation Terms Every Beginner Needs
- Drip Tubing Sizes and How to Pick One
- Drip vs Sprinkler vs Soaker Hose
- How Drip Irrigation Works, Step by Step
- How Long to Run Drip Irrigation
- How Much Water Does Drip Irrigation Save
- How to Calculate Plant Water Needs for Drip
- How to Plan a Drip Irrigation Layout
- Is Drip Irrigation Worth It: Cost Breakdown
- Starter Kit vs Custom Drip System
- Water Pressure Basics for Drip Systems
Frequently asked questions
Is drip irrigation hard to install for a total beginner?
Not really. Most home drip parts push together by hand with no glue, tools, or plumbing skill. A small garden bed usually takes an afternoon, and if you connect something wrong you just pull it apart and redo it.
How much does a basic drip system cost?
A starter kit for a small garden typically runs $30 to $80 and includes tubing, emitters, and the faucet parts. Larger yards cost more, but you can expand one bed at a time rather than buying everything at once.
Do I really need a pressure regulator?
Yes, almost always. House water often runs at 40 to 60 psi, while drip parts want about 15 to 30 psi. Without a regulator, fittings can blow off and emitters spray instead of drip, so the small part is worth it.
How long should I run a drip system?
Longer than a sprinkler, because the flow is slow. A drip zone often runs 30 to 60 minutes rather than 10. Check the soil a couple inches down afterward: aim for damp and crumbly, not soggy, and adjust from there.
Will the little emitters clog?
They can, especially with gritty or hard water, which is exactly why the system includes a filter. Flush your lines a couple times a season and rinse the filter, and clogs are rare. Ten minutes of maintenance keeps everything dripping evenly.
Can I use drip irrigation for my whole yard including the lawn?
Drip is ideal for garden beds, vegetable rows, shrubs, trees, and containers. For a wide lawn, sprinklers usually make more sense because grass wants even coverage across a large flat area. Many yards mix both methods.