Last spring a neighbor knocked on my door holding a tangle of black tubing and a plastic bag of little parts, half of them still sealed. She had bought a drip kit online, spread everything across her patio table, and frozen. “I don’t even know what half of these are called,” she said. That is the real hurdle for most beginners, and it has nothing to do with skill. It is vocabulary.
Once you can name the pieces, the whole system stops looking like a pile of mystery plastic. So before you spend a dollar, let me walk you through the core drip irrigation parts the way I would if we were standing in my garage. No shopping list yet, just names and jobs.
Key takeaways
- Every drip system is built from the same handful of parts, no matter the brand or size.
- Water flows in a set order: source, then pressure control and filter, then mainline, then small feeder lines, then emitters at each plant.
- Knowing the vocabulary first makes shopping and troubleshooting far less confusing.
Start at the faucet: the connection parts
Everything begins at your water source, usually an outdoor spigot. The first thing that screws onto that faucet is a backflow preventer, a small valve that stops dirty garden water from being siphoned back into your drinking supply. Many kits include one, and a lot of local codes require it.
Right after that sits the pressure regulator. House water often runs at 40-60 psi (pounds per square inch, a measure of water pressure), but drip systems are happy at 15-30 psi. Push too much pressure through and you will blow fittings apart or pop emitters right off the line.
Then comes the filter, sometimes called a Y-filter for its shape. Drip openings are tiny, and a single grain of grit can clog one. A basic 150-mesh screen filter costs around 8 to 15 dollars and saves you hours of frustration.
Watch out
A mistake I see constantly is skipping the pressure regulator to save ten dollars. Full house pressure will shred a drip system within a season. I have watched a fitting rocket off a line and soak a gardener from the knees down. Buy the regulator.
The tubing: mainline and feeder lines
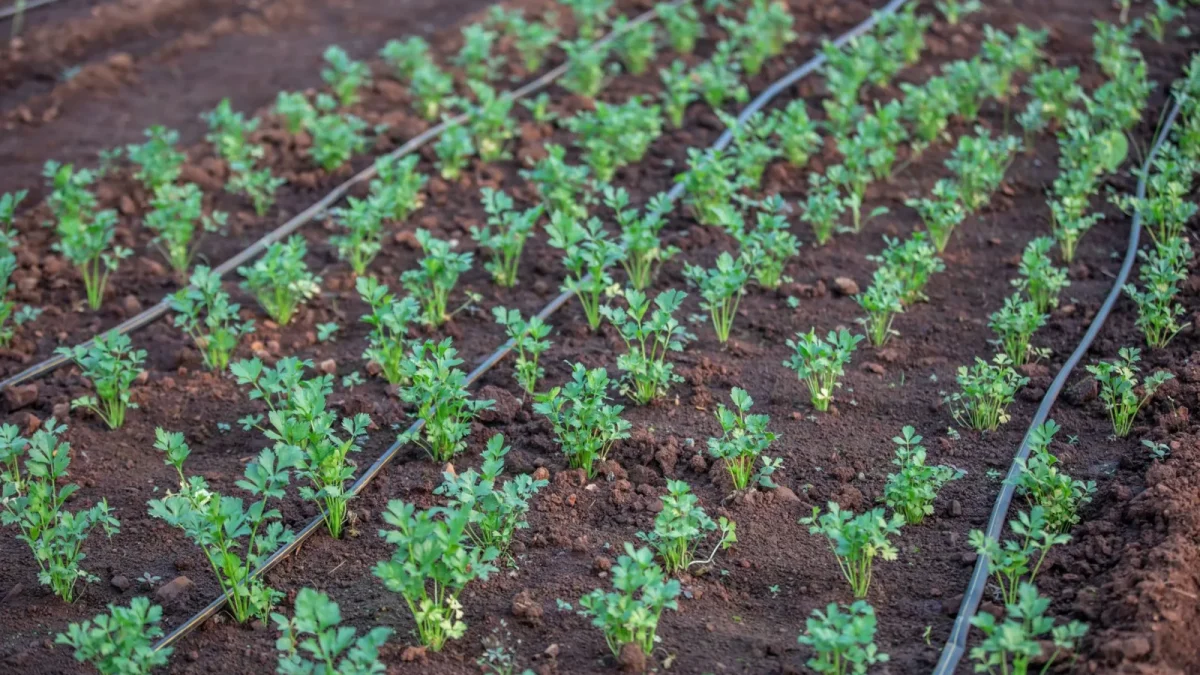
Now the water needs a path. That path is tubing, and there are two sizes you will hear about constantly.
The mainline (also called supply tubing or poly tubing) is the thicker line, usually 1/2 inch in diameter. It carries water from the faucet out into your garden and forms the backbone of the whole layout. It is flexible, black, and typically sold in 50 or 100 foot rolls.
Branching off the mainline are the feeder lines, the skinny 1/4 inch tubing that runs the last stretch to each individual plant. Think of the 1/2 inch line as the street and the 1/4 inch lines as the driveways. You poke a hole in the mainline, insert a tiny connector, and run a feeder line right to the base of a tomato or a rose.
At the far end of the mainline you cap things off with an end cap or a figure-eight closure, which simply seals the line so water does not gush out the tip.
The emitters: where water actually comes out
Here is the heart of the system. An emitter (also called a dripper) is the small fitting that releases water slowly, one drop at a time, right at the root zone. This slow, targeted delivery is what makes drip so efficient compared to spraying water into the air.
Emitters are rated in gallons per hour, shortened to GPH. Common ratings are 0.5, 1, and 2 GPH. A small herb might get a single 0.5 GPH emitter, while a thirsty shrub might get two 2 GPH emitters. If you want to understand how these numbers compare to other watering methods, my breakdown of how drip, sprinklers, and soaker hoses each deliver water lays it out side by side.
| Emitter type | Best for | Rough flow |
|---|---|---|
| Button dripper (0.5-1 GPH) | Herbs, small annuals, seedlings | Low and gentle |
| Higher-flow dripper (2 GPH) | Shrubs, tomatoes, roses | Moderate |
| Micro-spray or micro-sprinkler | Ground cover, tight plant clusters | Wider spray pattern |
| Inline emitter tubing | Rows and hedges (built-in emitters) | Evenly spaced drips |
You will also run into inline emitter tubing, sometimes called dripline. This is 1/2 inch tubing with emitters already built in every 6, 12, or 18 inches. It is wonderful for straight rows of vegetables because you skip poking dozens of individual holes.
The little parts that hold it together
The rest of a drip system is small connectors, and they are cheaper than you expect, usually pennies each. Once you know their names, the loose bag from my neighbor’s story stops being scary.
- Barbed connectors: tiny plastic pieces that join two lengths of tubing. Couplers connect two ends, tees split into two directions, and elbows turn a corner.
- Goof plugs: small stoppers that seal a hole you poked in the wrong spot. Everyone pokes a wrong hole. Keep a handful.
- Hole punch: a little tool that makes the clean opening where a 1/4 inch feeder line taps into the 1/2 inch mainline.
- Stakes: small hooks that pin tubing and emitters in place so they stay aimed at the roots.
Quick tip
Warm the end of stiff tubing in a mug of hot water for 30 seconds before pushing on a connector. When I first tried assembling a system on a cold morning, I nearly gave up wrestling cold, rigid tubing. The warm-water trick makes everything slide on easily.
How the parts fit together in order
Picture the water’s journey and the layout makes sense. Here is the sequence from faucet to plant.
- Faucet, then backflow preventer.
- Pressure regulator to tame the psi.
- Filter to catch grit.
- Adapter into the 1/2 inch mainline.
- Mainline routed through the beds, held by stakes.
- 1/4 inch feeder lines punched in and run to each plant.
- Emitters at the root zone, end cap on the tail.
That is genuinely the whole thing. A raised bed might use six parts total, while a full yard uses the same parts repeated many times. If any of these names still feel fuzzy, keep my plain-language glossary of drip irrigation terms for beginners open in another tab while you shop.
Good to know
Drip irrigation can use 30 to 50 percent less water than sprinklers because it delivers water straight to the roots instead of the air. That efficiency is a big reason the EPA promotes it for home landscapes.
Where to go from here
You now have the working vocabulary: source parts, tubing, emitters, and the small connectors that link them. That is more than most people know before their first purchase, and it will make every product page read like plain English.
For the bigger picture of how these pieces serve your plants, start with my beginner’s guide to drip irrigation basics. And if you are deciding whether to buy a boxed kit or assemble your own, my comparison of starter kits versus a custom drip build will help you choose. For water-saving guidance backed by testing, the EPA WaterSense watering tips and the University of Arizona Cooperative Extension are both solid, honest resources.
Frequently asked questions
What are the essential parts of a drip irrigation system?
At minimum you need a backflow preventer, a pressure regulator, a filter, mainline tubing, feeder lines, and emitters. Most systems also use small connectors, stakes, and an end cap. A raised bed can work with as few as six parts, while a full yard just repeats the same components many times.
Do I really need a pressure regulator for drip irrigation?
Yes. Home water often runs at 40-60 psi, but drip systems are designed for 15-30 psi. Without a regulator, the extra pressure blows fittings apart and pops emitters off the line, often within a single season. It costs about ten dollars and prevents constant repairs.
What is the difference between 1/2 inch and 1/4 inch tubing?
The 1/2 inch mainline is the thick backbone that carries water from the faucet through your garden. The 1/4 inch feeder lines are skinny branches that run the last few feet to each plant. Think of the mainline as a street and the feeder lines as individual driveways.
What does GPH mean on a drip emitter?
GPH stands for gallons per hour, the rate at which an emitter releases water. Common ratings are 0.5, 1, and 2 GPH. A small herb might use a single 0.5 GPH emitter, while a thirsty shrub or tomato might get two 2 GPH emitters.
Why does a drip system need a filter?
Emitter openings are extremely small, and a single grain of sand or grit can clog one and leave a plant dry. A basic 150-mesh screen filter, often shaped like a Y, costs around 8 to 15 dollars and catches debris before it reaches the tubing. It is one of the cheapest ways to prevent headaches.
Can I use a boxed kit instead of buying parts separately?
Absolutely, and for a first project a kit is often the easiest route since it bundles matched parts together. As your garden grows you can add individual components to the same layout. Comparing a starter kit against a custom build helps you decide which fits your space and budget.