Last August I got a text from a client three days into a road trip: “Marisol, my tomatoes are crispy.” She had a beautiful drip system in her Tucson backyard, but she still turned the water on and off by hand. One forgotten morning in 105-degree heat, and the plants paid for it.
That is the whole reason timers exist. A drip system delivers water slowly and precisely, but somebody still has to open the tap. Put a timer in that spot and the “somebody” becomes a small battery-powered box that never forgets, never oversleeps, and never leaves on vacation.
If you want to automate drip watering with a timer, the core idea is simple: the timer sits between your faucet and your drip tubing, and it opens and closes the water on a schedule you set once. Everything else is detail. Good detail, but detail.
Key takeaways
- A tap timer screws onto your hose faucet and automates the on/off step of an existing drip system.
- You program a start time, a duration (how long water runs), and a frequency (which days), then walk away.
- Most home gardens run fine on a 20-40 psi timer feeding 1/2 inch mainline and 1/4 inch drip lines.
- Battery health, winter protection, and correct scheduling are the three things that decide whether it keeps working.
What a tap timer actually does
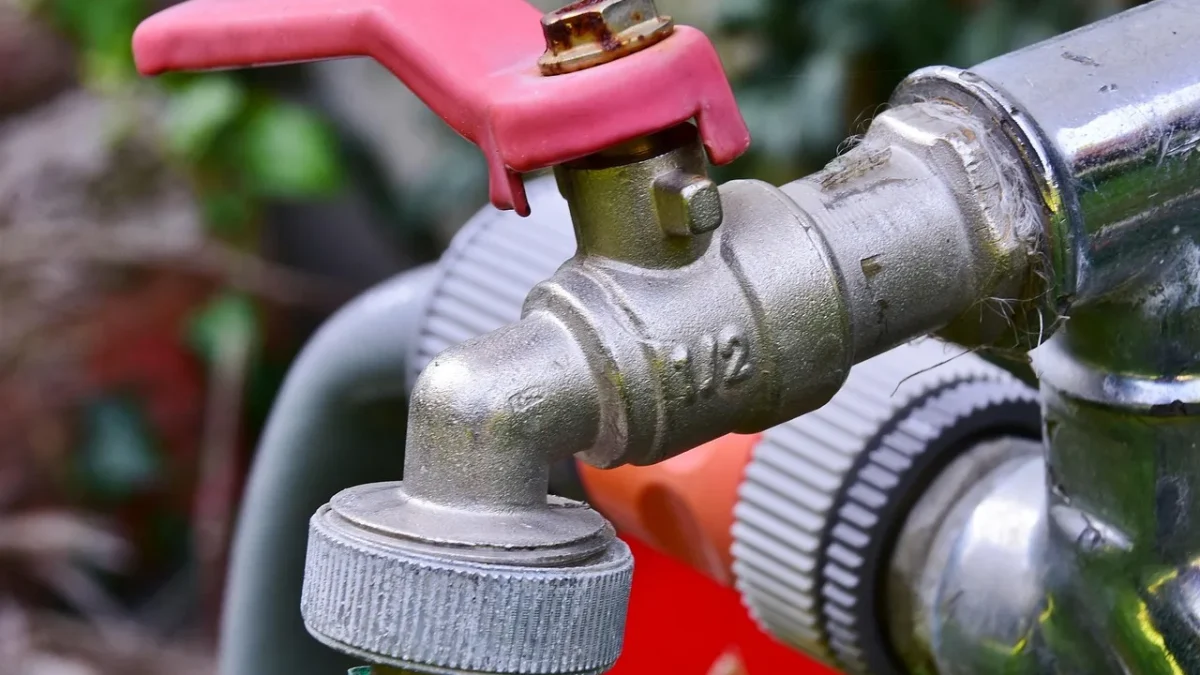
A tap timer (also called a hose timer or faucet timer) is a valve with a brain. It threads onto a standard 3/4 inch garden faucet, and your drip line connects to the other end.
Inside is a small motor or solenoid that physically opens and closes the water passage. A solenoid is just an electrically controlled valve. When the clock hits your start time, the valve opens; when the duration ends, it shuts.
That is the entire magic. It does not boost pressure, filter water, or fix leaks. It only handles timing, which happens to be the one job humans are worst at doing consistently.
Good to know
Most drip components want low pressure, around 10-25 psi. City water often arrives at 40-60 psi. A pressure reducer (about 10 to 15 dollars) installed after the timer keeps your 1/4 inch tubing from blowing off its fittings.
The pieces that make it hands-off
Automation is really three settings working together. Once you understand these three words, every timer on the shelf makes sense.
Start time is when watering begins. Early morning, roughly 4 to 7 a.m., is ideal because less water evaporates and leaves dry before nightfall.
Duration is how long the water runs, from a couple of minutes to an hour. A 1/4 inch emitter rated at 1 gallon per hour running for 30 minutes delivers half a gallon to that plant.
Frequency is which days it repeats: daily, every other day, twice a week. Getting these numbers right for your soil and plants is its own skill, and I walk through it in detail in the guide on how to program a drip watering schedule.
If you are still deciding how often and how long to run each cycle, my breakdown of the best watering frequency and duration for drip gives you starting numbers by plant type and soil.
Mechanical, digital, or smart
Timers come in three broad flavors, and the right one depends on how much control you want versus how simple you want your life.
| Type | How you set it | Rough cost | Best for |
|---|---|---|---|
| Mechanical | Twist a dial for run length | 10-20 dollars | One zone, simple needs, no batteries to fret over |
| Digital | Buttons and a small screen | 25-50 dollars | Precise start times and multiple cycles a day |
| Smart (Wi-Fi) | Phone app | 50-120 dollars | Remote control, weather skipping, travelers |
A mechanical timer is the flip phone of irrigation: limited, but nearly unbreakable. A digital one gives you real clock times and repeat schedules. If you want the full trade-off, I compare them side by side in digital vs mechanical hose timers.
Smart timers connect to your home Wi-Fi so you can adjust watering from your phone or let it skip a cycle after rain. That last feature alone saves real water. If you are curious how the remote control and weather logic work, see my primer on how Wi-Fi drip timers and smart controllers work.
Setting one up for the first time
Installing a basic timer takes about ten minutes and no tools beyond your hands. Here is the honest sequence.
- Screw the timer onto your faucet, hand-tight, with the little rubber washer seated inside.
- Attach a pressure reducer, then your 1/2 inch drip mainline, to the timer outlet.
- Insert fresh batteries (usually 2 AA or a 9-volt) and check the screen wakes up.
- Set the current time on the clock. Skip this and every schedule runs at the wrong hour.
- Program one short test cycle and watch water reach the emitters.
A mistake I see constantly: people set a beautiful schedule but never set the timer’s own clock. The box thinks it is midnight, so your 6 a.m. watering happens at 6 p.m. Always set the clock first. For a slower, photo-by-photo walkthrough, follow how to set up a hose-end tap timer step by step.
Quick tip
Run your first real cycle while you are standing there watching. You want to confirm water actually reaches the far end of the line before you trust it with a week away from home. Walk the whole run and look for dry emitters or blown fittings.
Watering more than one area
One faucet can water your whole yard, but different plants want different amounts. Cactus and agave sip; a raised bed of basil and peppers drinks.
That is where zones come in. A multi-outlet timer, or several single timers on a splitter, lets each area run on its own schedule. Your vegetables might get 20 minutes daily while your established mesquite gets 40 minutes twice a week.
Zoning is the single biggest upgrade most gardens can make, and it is not hard once you see the layout. I lay out the wiring and programming in the guide to setting up a multi-zone drip timer.
Keeping it alive year after year
A timer is a small computer sitting outdoors in the weather, so two things eventually threaten it: dead batteries and frozen water.
Weak batteries are the number one service call I get. The screen still glows, but the valve no longer has the muscle to open fully, so plants slowly starve. Fresh alkaline batteries once a year, ideally each spring, prevent almost all of it. My notes on battery care for drip timers cover which cells last and why the cold drains them faster.
Watch out
Water left inside a timer over a freezing night can expand and crack the valve body. If your winters dip below freezing, drain and store the unit indoors before the first hard frost.
Even here in the desert we get freezing nights, and a cracked timer is a springtime surprise nobody enjoys. The steps to protect it are quick, and I cover them in how to winterize a hose timer.
Picking the right timer for you
Before you buy, match the timer to your actual garden rather than the fanciest box on the shelf. A single herb bed does not need a Wi-Fi controller, and a sprawling xeriscape with six plant types will outgrow a one-dial mechanical unit.
Think about number of zones, whether you travel, and how cold your winters get. Those three answers point straight at the right category. If you want a structured way to decide, my guide on how to choose a drip irrigation timer turns it into a short checklist.
- Count your distinct watering zones (grouped by plant thirst).
- Decide if remote or weather-based control is worth the extra cost.
- Check your winter lows and plan to store or drain the unit.
- Confirm your faucet is a standard 3/4 inch hose thread.
Where to go from here
Automating your drip system is less about gadgets and more about handing off one boring, easy-to-forget chore to a reliable little box. Get the timer mounted, set its clock, dial in a sensible schedule, and mind the batteries and the frost.
For the water-saving logic behind good schedules, the EPA WaterSense program is a solid, trustworthy starting point, and many University of Arizona Cooperative Extension resources tailor advice to hot, dry climates like mine.
Pick the sub-topic that matches where you are stuck, follow that guide, and let your garden start watering itself. Your future self, three days into a road trip, will thank you.
More guides in Timers and Automation
- Battery Care for Drip Timers That Last
- Best Drip Timers for a Well or Low-Flow Source
- Best Watering Frequency and Duration for Drip
- Digital vs Mechanical Hose Timers Compared
- How to Adjust Your Watering Schedule by Season
- How to Choose a Drip Irrigation Timer
- How to Program a Drip Watering Schedule
- How to Set Up a Hose-End Tap Timer Step by Step
- How to Set Up a Multi-Zone Drip Timer
- How to Winterize a Hose Timer
- Rain Sensors and Rain Delay for Drip Timers
- Timer Runs but No Water: How to Fix It
- Vacation Watering With a Drip Timer
- Wifi Drip Timers: How Smart Controllers Work
Frequently asked questions
Do I need a special drip system to add a timer, or will any faucet work?
Almost any standard outdoor faucet with a 3/4 inch hose thread will work, which covers most homes. The timer screws on just like a garden hose. You do want a pressure reducer between the timer and your drip line so the low-pressure tubing does not blow apart.
How long should the timer run each cycle?
It depends on your emitters and plants, but a common starting point is 20-30 minutes for vegetable beds with 1 gallon-per-hour emitters. Sandy soil drains fast and may need shorter, more frequent cycles. Clay holds water longer, so you can run less often. Adjust after checking how deep the water soaks in.
Will a timer work if my water pressure is low?
Most tap timers open reliably down to about 10 psi, though a few need more. If your pressure is very low, choose a mechanical or digital timer rated for low pressure and skip the highest-flow emitters. Weak batteries can also mimic a low-pressure problem, so rule those out first.
What happens to my schedule when the batteries die?
On most timers the valve simply stops opening, so watering quietly stops even though the plants look fine at first. Many digital models keep the clock and schedule in memory for a short while, but do not count on it. Replace batteries once a year, ideally in spring, to avoid a dead system during peak heat.
Can I leave the timer outside all winter?
Only if your winters stay above freezing. Water trapped inside can freeze, expand, and crack the valve body, which ruins the unit. In cold climates, drain the timer and store it indoors before the first hard frost, then reinstall in spring.
Is a smart Wi-Fi timer worth the extra money?
If you travel often or want the system to skip watering after rain, yes, the convenience and water savings add up. For a single small bed that you can eyeball daily, a simple mechanical or digital timer does the job for a fraction of the price. Match the timer to how much control you actually want.