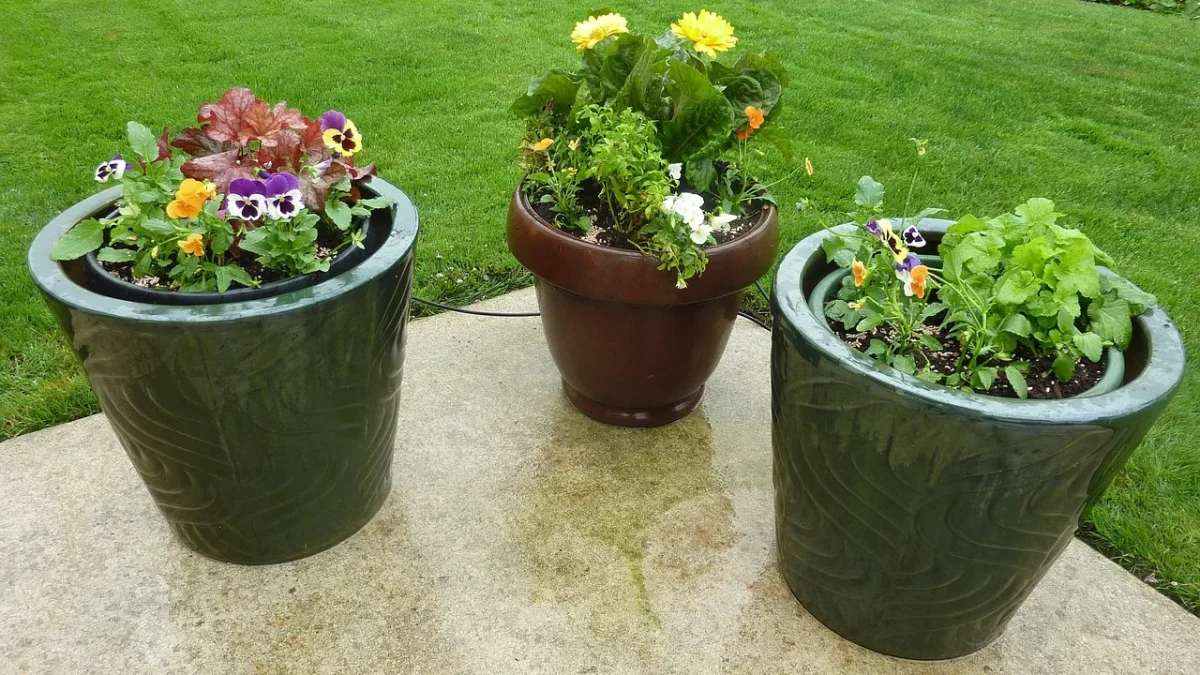
Last June a neighbor of mine went on a two-week trip and came home to eleven dead pots on her patio. Basil, geraniums, a fig she had babied for three summers. Gone. The heartbreaking part is that a system to keep all of it alive would have cost her about forty dollars and one Saturday afternoon.
Scattered pots are actually the easiest thing in the world to automate. Drip irrigation for containers is forgiving, cheap, and it does not care if your pots are spread across three corners of a patio. You just run a thin tube to each one and let a timer do the rest.
I have installed these systems on tiny balconies and on sprawling desert courtyards here in Tucson, and the parts are nearly identical. Let me walk you through it.
Key takeaways
- A single 1/2 inch supply line plus 1/4 inch micro-tubing branches reaches pots anywhere on a patio.
- Match emitter flow to pot size: roughly 1 gallon per hour for small pots, 2 GPH for large ones.
- Most home systems run on 25-30 psi, so a pressure regulator is not optional.
- A battery timer plus this setup keeps a scattered container garden alive while you travel.
Why containers love drip so much
Pots dry out fast. A gallon nursery pot in July sun can go from soaked to bone dry in a single day, and hand watering that unevenly is what kills plants slowly.
Drip fixes this by delivering a small, steady amount right to each root ball. Emitters (the little nozzles that meter out water) come rated in gallons per hour, so you dial in exactly how much each pot drinks.
That precision is the whole point. A tomato in a 15 gallon pot and a succulent in a 6 inch pot can share the same tubing and still get wildly different amounts of water.
What you will need
The full parts list is short, and none of it is expensive. Here is what goes into a typical patio setup.
- A faucet timer (battery powered, around $30-40)
- A backflow preventer and a pressure regulator, usually rated to 25-30 psi
- A hose-thread to tubing adapter
- 1/2 inch mainline tubing (the backbone that carries water)
- 1/4 inch micro-tubing (the thin branches that run to each pot)
- Single-pot emitters or adjustable drippers, 0.5 to 2 GPH
- Barbed connectors, tees, and an end cap or two
- Tubing stakes to hold drippers in the soil
Good to know
The 1/2 inch mainline is your highway. The 1/4 inch micro-tubing is the neighborhood street that peels off it to reach each pot. Keep those two sizes straight and the rest of this gets easy.
Plan the layout before you cut anything
Walk your patio and look at where the pots actually sit. Group them in your head into clusters, then imagine one 1/2 inch line snaking past all of them like a garden path.
From that mainline, a short 1/4 inch branch will jump off to each individual pot. Branches can be a few inches or several feet long, so pots that sit off on their own are no problem.
A mistake I see constantly: people try to run everything in skinny 1/4 inch tube from the faucet. That thin tubing can only carry water so far before pressure drops off, usually around 15-20 feet or a handful of emitters. Use the 1/2 inch as your trunk and you sidestep the whole problem.
If your setup is more permanent or you want the deep background on parts and pressure, my full walkthrough on how to install a drip irrigation system step by step covers the fundamentals in more detail.
Step by step assembly
Once you have your parts and a rough plan, the build itself takes under an hour for a dozen pots.
- Screw the components onto the faucet in order: timer, then backflow preventer, then pressure regulator, then the tubing adapter. This sequence matters for both safety and pressure.
- Run your 1/2 inch mainline from the adapter along your planned path, past every cluster of pots. Do not worry about it being pretty yet.
- At each pot, punch a hole in the mainline with the poke tool that comes in most kits, and press in a barbed 1/4 inch connector.
- Cut a length of 1/4 inch micro-tubing to reach from that connector up into the pot, and push it onto the barb.
- Attach an emitter to the pot end of the micro-tubing, then anchor it with a stake so it sits on the soil surface, an inch or two from the main stem.
- Cap the far end of your mainline. Turn the water on manually and watch every emitter drip.
That last step is not optional. Blowouts and dry pots almost always announce themselves in the first two minutes if you are watching.
Watch out
Never skip the pressure regulator. Household water often runs 40-60 psi, and drip tubing is happiest around 25-30 psi. Too much pressure blows connectors off and turns a quiet drip into a geyser inside your tubing. I have walked into more than one flooded patio because someone left the regulator in the box.
Matching emitters to your plants
This is where container drip gets satisfying. Each pot can get its own emitter size, so thirsty and thrifty plants live side by side.
Here is a rough guide I use as a starting point. Soil, sun, and pot material all shift these, so treat it as a first draft and adjust after a week of watching.
| Pot size | Example plants | Emitter flow |
|---|---|---|
| 4-6 inch | Herbs, succulents, small annuals | 0.5 GPH |
| 1-3 gallon | Peppers, geraniums, salvia | 1 GPH |
| 5-10 gallon | Tomatoes, small citrus, roses | 2 GPH |
| 15+ gallon | Dwarf fruit trees, large shrubs | Two 2 GPH emitters |
For big pots, two emitters on opposite sides wet the root ball more evenly than one dripper trying to soak the whole thing from a single spot. Terracotta dries faster than plastic, so bump those up a notch too.
Quick tip
Adjustable drippers cost a little more but let you turn each pot up or down by hand without swapping parts. On a mixed patio where a fern and a cactus share one line, they are worth every penny.
Setting the timer and dialing it in
Start conservative. For most containers I begin with two short cycles a day in summer heat, maybe 5-10 minutes each, and adjust from there.
Check the pots after the first day. Poke a finger two inches into the soil. Damp is good, soggy means back off, dust dry means add a few minutes or a bigger emitter.
Containers rarely need the long, slow soak that in-ground beds want. If you also grow rows in the ground, the timing there is a different animal, and my guide to drip line installs for long vegetable rows gets into those longer run times.
Feeding the system without a faucet
Not every patio has a spigot right there. If yours does not, or if you want to stretch your water, container drip runs beautifully off collected rain.
You need enough height to get gravity pressure, but a raised barrel can push a modest patio setup. I walk through the fittings and the head-height math in this piece on how to connect drip irrigation to a rain barrel.
The U.S. EPA’s WaterSense program has solid, plain guidance on watering efficiently if you want to trim your usage further.
Keeping it tidy and trouble free
Bare micro-tubing looks a little busy at first. On a patio you can tuck the 1/2 inch mainline behind the pots or under a lip of decking, then bring only the short 1/4 inch runs up into view.
Loose tubing along a wall can hide under gravel or bark, the same trick I describe for running drip tubing under mulch in beds. It protects the tube from sun and keeps the whole thing from looking like a science project.
Flush the mainline once a month by pulling the end cap and letting it run clear for thirty seconds. Grit is the number one cause of clogged emitters, and a quick flush clears most of it. The folks at University of Minnesota Extension have good background on how much water different plantings actually want.
Where to go from here
Get one small cluster of pots running first. Seeing three or four emitters drip on cue builds the confidence to expand across the whole patio, and expanding is just more of the same tube and barbs.
Once your container drip is dialed in, you will wonder how you ever managed the watering can. And the next time you travel for two weeks, you will come home to living plants instead of eleven sad pots.
Frequently asked questions
How many pots can one drip system water?
A single 1/2 inch mainline running at typical home pressure can comfortably feed 20 to 30 emitters, which covers a good-sized patio. If you have more pots than that, you can split into two zones or add a second mainline off the same faucet. The limiting factor is total flow, not the number of pots.
Do I really need a pressure regulator for just a few containers?
Yes, even for a handful of pots. Household water often runs 40 to 60 psi, and drip fittings are rated for around 25 to 30 psi. Without a regulator, high pressure pops connectors loose and can flood your patio. A regulator costs about ten dollars and prevents the most common failure.
What size tubing should I use for scattered patio pots?
Use 1/2 inch tubing as the main supply line that runs past all your pots, then branch off to each container with thin 1/4 inch micro-tubing. The 1/2 inch carries water efficiently over distance, while the 1/4 inch is flexible enough to snake up into individual pots. Trying to do everything in 1/4 inch tubing leads to pressure loss past 15 to 20 feet.
How long should the timer run each day for containers?
Start with two short cycles a day, roughly 5 to 10 minutes each in hot weather, then check the soil moisture and adjust. Containers dry out faster than garden beds but hold less water, so short frequent cycles usually beat one long soak. Poke a finger two inches into the soil to judge whether to add or subtract time.
Can drip tubing stay outside through winter?
In mild climates it can stay put year round. Where lines freeze, drain the system and disconnect the timer and regulator before the first hard freeze, since trapped water expands and cracks fittings. Bringing the small parts indoors and leaving the tubing in place is the easiest routine for most patios.
Will one emitter be enough for a large pot?
For pots up to about 5 gallons, a single emitter sized to the plant usually does the job. For 15 gallon pots and larger, two emitters placed on opposite sides of the root ball wet the soil far more evenly than one. Uneven watering in big containers tends to leave dry pockets that stress the roots.