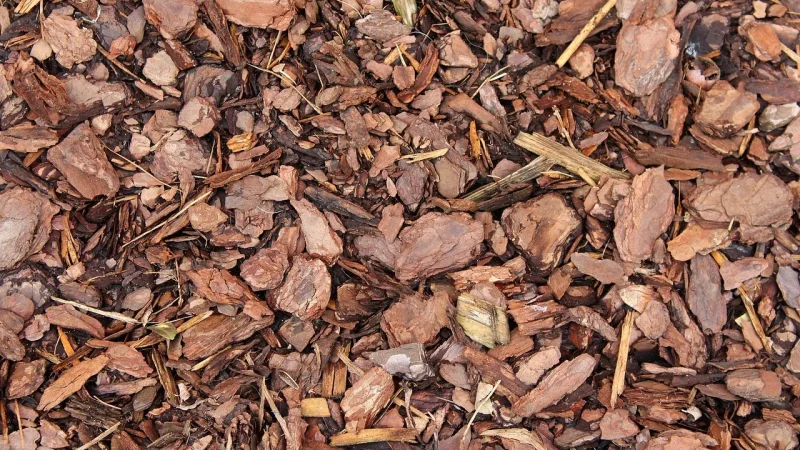
The first warm Saturday of spring, I turned on a client’s system in the Catalina foothills and watched a geyser shoot straight up out of the mulch. Not a drip. A geyser. The pressure regulator had a hairline split running down one side, and the moment water hit it, the crack blew wide open.
That is the sneaky thing about freeze damaged drip parts. The plastic looks fine all winter. Then you pressurize the line in March and everything you missed announces itself at once.
Ice does the damage because water expands as it freezes, roughly 9 percent by volume. Trapped inside a regulator body or a valve chamber, that expansion pushes outward with enough force to crack rigid plastic. You won’t hear it happen. You just find the results in spring.
Key takeaways
- Pressure regulators, backflow devices, and rigid valve bodies are the parts most likely to split from winter ice.
- Most cracks stay invisible until you pressurize the line, so test at low flow first and watch for spray or bulges.
- Regulators and valves get replaced, not repaired. Fittings and short tubing runs are cheap swaps.
- Draining and insulating vulnerable parts each fall prevents almost all of this.
Which parts actually crack (and which usually survive)
Not everything in your system is equally at risk. Flexible poly tubing, the 1/2 inch black mainline and the 1/4 inch feeder line, tends to stretch and survive a freeze because the material gives a little.
The rigid stuff is the problem. Anything molded from hard plastic with a hollow chamber inside is a candidate: pressure regulators, anti-siphon valves, backflow preventers, and threaded fittings where water pools and can’t drain.
| Part | Freeze risk | Typical fix and rough cost |
|---|---|---|
| Pressure regulator | High | Replace, $8 to $15 |
| Backflow preventer | High | Replace, $12 to $30 |
| Anti-siphon valve body | High | Replace valve or bonnet, $15 to $40 |
| Rigid tee, elbow, coupling | Medium | Cut out and swap, $1 to $4 each |
| 1/2 inch poly tubing | Low | Rarely needs work |
A pressure regulator, by the way, is the little inline device that drops your house water pressure (often 50 to 70 psi) down to the 10-30 psi that drip emitters are built for. Run drip at full house pressure and you’ll blow emitters off the line, which is a whole separate headache I cover in my guide on keeping drip emitters from popping off the line.

How to find the cracks before they find you
Start dry. Before you send any water through, walk the system with your eyes and your fingers.
Look at every regulator, valve, and backflow device. Hairline freeze cracks often show up as a faint white stress line in the plastic, sometimes with a slight bulge where the wall pushed out. Run your thumbnail along the seams. If it catches, that’s a crack.
Quick tip
Cold plastic hides cracks. Do your inspection on a warm afternoon when the parts have had sun on them, because the material expands slightly and existing splits open up just enough to see and feel.
Then pressurize slowly. Open the valve maybe a quarter turn so water eases in at low flow instead of slamming the system. A gentle start lets you catch a small leak before it becomes a blowout.
Now watch and listen. Fine spray, a wet spot that keeps growing, a hissing sound, or water welling up at a threaded joint all point to a split. Mark each spot with a piece of tape so you can find it again once the water is off.
If a whole section stays dry while the rest runs, you may have a cracked part upstream choking the flow. That overlaps with diagnosing a single drip zone that won’t water, so start there if an entire run is dead.
Replacing a split pressure regulator
Regulators are sealed units. You don’t fix them, you replace them, and honestly at $8 to $15 it isn’t worth trying to salvage one.
- Shut off the water at the hose bib or zone valve and let the line drain.
- Note the flow direction. Regulators have an arrow molded into the body. Water must flow the way the arrow points.
- Unscrew the old regulator. These are usually hose thread, so it’s often hand tight or one turn with pliers.
- Check the rubber washer inside the swivel nut. Replace it if it’s flat or cracked.
- Thread on the matching replacement. Match the psi rating and the gallons-per-hour range to what you had, since a 25 psi regulator behaves very differently from a 10 psi one.
- Hand tighten, then a quarter turn with pliers. Don’t crank it. Over tightening cracks the new one.
Watch out
Always confirm the arrow direction before you tighten. A regulator installed backward will pass full house pressure straight to your emitters, and you’ll be replacing popped fittings all afternoon. I’ve done it. Once.
Swapping cracked valves and fittings
Valve bodies are trickier because they’re often glued or threaded into a manifold. If only the top (the bonnet or cap) is cracked, many brands sell that piece separately for $10 to $20, which saves you tearing out the whole assembly.
If the valve body itself is split, plan to replace the entire valve. Take a clear photo and the old part to the store so you match the brand and size, because a Rain Bird and a Hunter valve are not interchangeable.
Fittings are the easy wins. For a cracked tee, elbow, or coupling on 1/2 inch poly line:
- Cut the tubing 1-2 inches back on each side of the bad fitting with a sharp pruner or tubing cutter.
- Pull the old fitting off. Compression and barbed fittings usually twist free once the line is cut.
- Warm the tube ends in a cup of hot water for 30 seconds so they slide onto the barbs easily.
- Push the new fitting fully home on both sides. You want the tube seated past the barb ridge.
A mistake I see constantly: people reuse a fitting that “looks okay” right next to one that clearly cracked. If two fittings sat in the same puddle over winter, they froze together. Replace both while you’re in there.
Good to know
Refilled lines often push out a slug of gunk that built up over the dormant months. If your emitters sputter after repairs, the issue may be buildup rather than a new crack. My walkthrough on clearing algae and biofilm from drip systems covers a good spring flush.
Preventing it next winter
Every repair here is avoidable. Before the first hard freeze, drain and protect the vulnerable parts.
Shut off the supply, open the end caps, and let the mainline empty. Unscrew hose-end regulators and backflow devices, drain them, and store them in the garage. Those two parts cause most of the spring drama, and they take five minutes to remove.
For fixed valves you can’t remove, wrap them in foam pipe insulation or an insulated pouch. The EPA’s WaterSense program has solid seasonal guidance, and your local extension office (Arizona gardeners can lean on the University of Arizona Cooperative Extension) can tell you your area’s frost dates.
Here in Tucson we only get a handful of freezing nights, but even one 25 degree night is enough to split a regulator full of water. Cold-climate gardeners protecting agaves, rosemary, or young citrus should be extra thorough.
Where to go from here
Walk the whole system once with fresh eyes, replace anything that shows a crack or a bulge, and pressurize slowly to confirm your fixes hold. Freeze damaged drip parts are frustrating, but they’re some of the cheapest and fastest repairs you’ll ever make on a drip system.
If you’re still chasing leaks or dead zones after this pass, work through the broader drip irrigation troubleshooting guide to sort out what’s left. Then mark your calendar for a fall drain-down so next spring starts with water in the emitters, not in the mulch.
Frequently asked questions
How do I know if a crack is from freezing or just old age?
Freeze cracks usually run lengthwise along the body of a regulator or valve, often with a slight outward bulge where the ice pushed the wall. Age and sun damage tend to make plastic brittle and crumbly all over rather than splitting in one clean line. If the part looks fine but leaks the moment you pressurize, ice is the likely culprit.
Can I glue or tape a cracked pressure regulator instead of replacing it?
No, and I wouldn't try. Regulators are sealed pressure devices, and any patch will fail the moment full line pressure hits it. At $8 to $15 for a new one, replacement is cheaper than the water you'd waste and the emitters you'd damage from an unregulated line.
My tubing looks fine but a whole section is dry. What happened?
A cracked part upstream, often a regulator or valve, can leak enough pressure that water never reaches the far end of the run. Check every rigid component between the supply and the dead section. Flexible poly tubing rarely cracks from freezing, so the fault is almost always in a rigid fitting or valve.
Do I need to match the psi rating when I replace a regulator?
Yes, this matters a lot. A regulator rated for 25 psi delivers very different pressure than a 10 psi model, and the wrong one can pop emitters or starve them. Check the number printed on your old regulator and buy the same rating, along with a matching gallons-per-hour range.
How cold does it have to get to crack drip parts?
Water freezes at 32 degrees Fahrenheit, and a single night at or below that can split a regulator or valve holding trapped water. It is not about how long the cold lasts so much as whether water was sitting inside a rigid part when it froze. Even mild-winter areas like Tucson lose parts to one hard night.
When should I drain my drip system for winter?
Drain it before your first expected hard freeze, which your local extension office can pin down by frost date. Shut off the supply, open the end caps to empty the mainline, and remove hose-end regulators and backflow devices to store indoors. Wrap any fixed valves you cannot remove in foam insulation.